

The one rule worth learning first
Almost every reward in this game is paid as “N minutes of your current production” — not as a fixed pile. Ark Fall salvage, First Wave claims, deep-exploration node caches, the Offline Surge boost, expedition hauls: all of them look at how fast your camp is producing at the moment you claim, multiply by a duration, and hand you that.
Which means the single most valuable habit in the game is: raise your rate first, claim second. A First Wave stage claimed while a Bountiful Yield boost is running is worth double the same stage claimed a minute later. A node cache claimed after you have moved everyone onto gathering duty is worth far more than one claimed while half your camp is out on an expedition.
Nothing expires in a hurry, so there is almost never a reason to claim something the instant it appears. Stack first.
Before you claim a First Wave stage or a fat Abandoned-camp cache: pull your expedition crews home, put everyone on gathering duty, wait for a ×2 boost if one is drifting past, then claim.
Your first hour
The opening is deliberately small. You are the only producer in the camp until you wake somebody.
- Click for 20. Gather 20 units total (any mix of water, food and material) and Search the Wreck unlocks.
- Wake the first survivor. Costs material: 30 × 2.7ⁿ for survivor n. Your first unlocks Tools; reaching two unlocks Expeditions.
- Put them on material. Material buys both tools and the next survivor, so it is the bottleneck for the whole early game. Water and food only need to stay above zero.
- Watch the deprivation penalty. Everyone — you included — drinks water and eats food every tick. Run one dry and all gathering drops to ⅓. Run both dry and it drops to ⅙. This is the number one thing that silently ruins an early camp.
- Buy the first tool levels early. A tool level is 50 × 2.7ˡᵉᵛᵉˡ material and adds +100% of base to that resource — for your survivors and your own clicks. The first two or three are absurdly cheap relative to what they give.
- Send a 30-second expedition the moment you have two survivors. It is the cheapest possible way to start the cumulative-time clock that eventually charts a new area.
Upkeep is (survivors + 1) × ⅓ per second of both water and food. So each new survivor costs you ⅓/sec of each — keep enough people on water and food that the stockpiles trend upward, and put the rest on material.
The multiplier stack — what actually makes numbers go up
Gathering rate per resource is a product, not a sum. Everything below multiplies with everything else, which is why progress feels flat for a while and then suddenly does not:
rate = assigned × 1.0 × (1 + skillLevel) × (1 + toolLevel × toolAmp) × deprivation × eventMult × memoryMult × settlementMult- Assigned survivors — linear, and the only term you control minute to minute.
- Resource skill — camp-wide, per resource. Every unit gathered is XP; 600 × 2.7ˡᵉᵛᵉˡ to advance. Each level is +100% of base. Crucially, XP comes from all survivors on that resource — so piling people onto one resource levels it faster and gathers more.
- Tools — 50 × 2.7ˡᵉᵛᵉˡ material, also +100% of base each.
- Memories — permanent, across every run. Gathering ×2 is the first one to buy.
- Settlement facilities — the deepest multipliers in the game, but they need a settlement first.
Because skill XP is per-resource and pooled across everyone assigned to it, putting eight survivors on material and rotating them is meaningfully better than putting three on each resource forever. Get material's skill up, buy the tools, then rebalance.
Player level is a separate track — and it no longer stalls
Your player level is fed by clicks (1 XP each, manual or auto) and, since 1.0.6, passively by your survivors as they gather — at one tenth the click rate per unit produced. Clicking is still worth 10× per unit, so hands-on play is rewarded; it is simply no longer the only thing that counts. 400 × 3.7ˡᵉᵛᵉˡ XP per level, one spendable point each.
Six upgrades: water / food / material auto-click (one click per second per level — these are the engine of a hands-off camp), Storage (+25% click yield), Offline (+10 min offline capacity), and Birth (+1 camp survivor per hour).
An auto-click point pays twice: it gathers for you, and each auto-click is a full 1 XP toward your next player level. It is the only upgrade that accelerates its own track.
Expeditions, properly
Stage survivors on the Expedition duty, choose a length, and send. The party is locked in until it returns. Since 1.0.7 there are seven lengths:
What comes home splits into two very different things, and this is the part most players get wrong:
- Water, food and material = your camp's current production per second, plus the party gathering on the road, × the trip's duration. Every survivor you send hauls at the rate they would have gathered at camp — and they do it for all three resources at once, not just the one duty they were on.
- Parts = party size × duration × a small constant.
Until 1.0.7 the water/food/material haul ignored party size completely: only parts scaled with crew. Worse, because crews stop gathering at camp while still drawing upkeep, a bigger party actively lowered the production the haul was calculated from — sending people was a downgrade for supplies. The party now carries its own weight, so a bigger crew means more of everything, and anyone standing idle should be on a trip.
How to actually get more out of a trip
- Run all three lines. You get one free; a second and third open via the store or for free by staffing an Expedition Bay in your settlement. Three lines out is three times the cumulative time.
- Keep your camp strong while a trip is out. The haul is computed from your production at the moment the party returns, so a camp that levelled up mid-trip pays out at the new, higher rate — and since the crew's own rate uses the same skill and tool levels, levelling up helps both halves of the haul.
- Send everyone who is idle. An idle survivor gathers nothing and still eats. On a trip they haul all three resources plus parts.
- Match the length to your session. A 30-second trip is for actively playing; the 12- and 24-hour tiers exist so you can set the camp going and come back tomorrow without losing a day of expedition time.
- Never cancel a trip you can wait out. A recall returns the party in half the elapsed time and pays nothing at all — no resources, no parts, no credited time.
Route facilities, the Faster-Expeditions memory and the Rapid Expedition item all shorten how long you wait — but the game still credits the full original duration toward finding survivors and charting areas. A 24-hour trip cut to 18 hours by upgrades still counts as 24 hours. Stacking expedition time-reduction is the single most efficient progression multiplier in the mid-game.
Charting new areas faster
Two milestones run off the same counter — cumulative completed expedition time:
- Every 6 hours → another survivor is found and joins automatically.
- At 12 hours → a new area is charted and you can break camp into it. (This was 24 hours before 1.0.6.)
Crew size does nothing for either — this is the one place party size genuinely does not help, even after the 1.0.7 haul change. What moves the counter is total time out, so:
- Keep every line busy. Three lines running 12-hour trips reach the area gate in a third of the wall-clock time of one line.
- Prefer longer tiers when you'll be away. An idle line credits nothing. A 24-hour trip left running overnight beats a 3-hour trip that finished six hours ago and has been sitting home since.
- Stack expedition time-reduction (Route category facilities, the Faster-Expeditions memory). Full time still credits — so this straightforwardly compresses the wait.
- Build the Route facilities that target discovery directly — Field Map Table and Departure Signal make each trip count for more toward the next region, and Observation Mast finds expedition survivors sooner.
Speeding up the descent — without spending anything
Deep Exploration is a static 100-node map you descend one edge at a time. The base travel time is 2 hours per edge, and the party moves online and offline alike. There is no way to "assign more people" to make it go faster — the levers are different, and they are all free:
1. Never leave the party sitting at a fork
At a branch point the party stops and waits for you to choose, and it will never auto-pick — including during offline progress. Offline reconciliation halts cleanly at the next fork, which means a party parked at an unanswered fork earns nothing for however long you are away.
Going to bed with a fork pending can cost you an entire night of descent. Always glance at the Deep Exploration page before you close the game and make sure the party is travelling, not waiting.
2. Take the forks — usually
A fork lets you skip ahead by one node and rejoin two nodes later. The map is built so a fork can never skip anything that matters: no Story, Evidence, Contact, Abandoned camp or the Hatch is ever bypassable — only a plain Site node. So the trade is exactly "one ordinary cache" against "one 2-hour leg".
- Racing for the Hatch / the Deep Ark? Take every fork.
- Farming caches, or want all seven First Wave stages as early as possible? Take the long way — you lose nothing but time, and the extra Site caches are real resources.
3. Build the two facilities that shorten legs
- Deep Interface (Record category) — directly cuts deep-exploration travel time.
- Marker Workbench (Route category) — makes every node cache you claim bigger.
Both need workers assigned to their category to do anything at all — an unstaffed category is completely dormant, which is a very common oversight.
4. Buy Faster Deep Explore with Memories
The Faster Deep Explore memory upgrade cuts leg time by 25% per level, down to −90%. At the deep end that turns a 2-hour leg into roughly 12 minutes, which changes the whole texture of the descent. It is the single biggest free speed-up available and it is permanent across every future run.
5. Use Time Warp on legs, not on clicks
The Time Warp floating boost doubles the passage of time for 60 seconds — and that includes deep exploration travel and expedition countdowns, not just gathering. Collecting one while a long leg is running is worth strictly more than collecting one while you sit clicking.
6. Claim the caches at your peak rate
Node caches are paid in minutes of current gather (a plain Site is 15 minutes, most special nodes 20, an Abandoned camp 30, and the Hatch a full hour) and banked straight into your Settlement. Same rule as everything else: get your production high, then claim the backlog.
You do not have to claim a node the moment you reach it. Let several accumulate, push your gather rate up with tools, skills and a ×2 boost, then claim them all in one pass.
Free accelerants — Ark Falls, boosts and waves
Four systems hand out real progress for nothing but attention. None of them require a purchase.
 Ark Fall
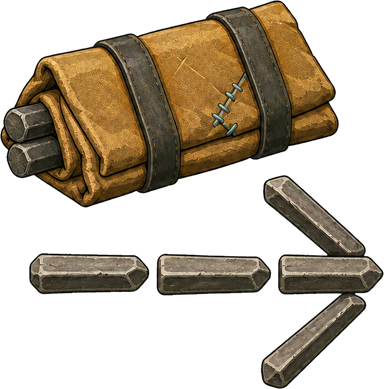
Roughly every 13 minutes of active play, pieces of the Ark rain across the screen, the whole UI jolts, and a pulsing salvage marker settles in the bottom-right corner. Click it. It rotates through four payouts, each worth about ten minutes of production:
- Salvaged resources — water, food and material, plus a coin-flip chance of a bonus chunk of parts, medicine, power or fuel banked straight to your settlement.
- Recovered research — scales with your survivor count.
- Cryo-pod survivors — always a whole number, and sized at 12% of your current survivors (minimum one). This one compounds: the bigger your camp, the bigger every future cryo drop.
- Cleared debris — knocks 10 minutes off your current expedition.
The 13-minute timer only runs while no salvage is waiting to be collected. Leave the marker sitting there and you are not "saving it" — you are stopping the next one from ever spawning. Claim it as soon as you see it.
The rotation is smart about your progress: the research payout falls back to resources if you haven't unlocked research yet, and the expedition payout falls back to resources if nothing is out — so no Ark Fall is ever wasted.
 Floating boosts
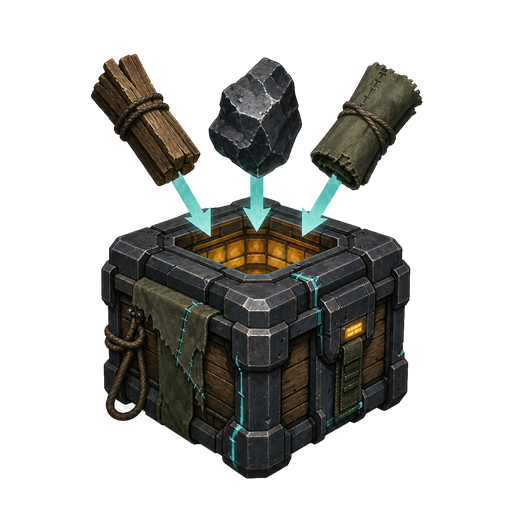
About once a minute a boost icon drifts across the screen from one edge to another, taking 9–15 seconds to cross. Click it before it leaves. Five kinds, chosen at random:
 Time Warp
×2 speed for 60 seconds — everything advances twice as fast, including expedition and descent timers.
Time Warp
×2 speed for 60 seconds — everything advances twice as fast, including expedition and descent timers. Offline Surge
Instantly runs 5 minutes of full simulation — gathering, research and every timer.Bountiful Yield
×2 on all resource collection for 60 seconds.
Offline Surge
Instantly runs 5 minutes of full simulation — gathering, research and every timer.Bountiful Yield
×2 on all resource collection for 60 seconds. Swift Return
Cuts 5 minutes off the current expedition's countdown.
Swift Return
Cuts 5 minutes off the current expedition's countdown. Insight
Grants 5 minutes' worth of research.
Insight
Grants 5 minutes' worth of research.Swift Return does nothing if no expedition is out. Insight does nothing if you have no researchers assigned. Since the five are drawn at random, keeping a trip running and at least one researcher on duty converts two otherwise-dead boosts into real progress — permanently, for free.
The best pairing in the game: catch a Bountiful Yield, and while it is running, claim a First Wave stage or a pile of deep-exploration caches. Both are paid at your current rate, so the ×2 applies to the whole payout.
 First Wave stages
There are exactly seven Evidence nodes on the deep map, and each one you claim reveals a First Wave stage. Claiming a revealed stage grants 30 minutes of your current gather plus ×2 to all resource gain for 10 minutes. These are the largest single payouts in the mid-game, and they are entirely rate-dependent — do not claim one casually.
Everyone home and on gathering duty → wait for a Bountiful Yield → claim the First Wave stage (30 min of doubled production) → its own ×2 stacks on for another 10 minutes → claim your banked node caches inside that window.
 Events, and the Chronology Wall
Events pause the world and apply an effect on Continue — a windfall, a loss, a timed shift in gathering or upkeep. A recurring one fires every 30–360 minutes of play. They never fire while you are offline, so they are purely an active-play bonus.
If you want more of all of this: the Chronology Wall facility (Record category) increases how often both Ark Falls and floating boosts appear. It is the closest thing the game has to a "more free stuff" button.
Settlement & research priorities
Breaking camp for the first time permanently unlocks the Settlement and Research pages, and banks your entire camp — water, food, material, parts and every survivor — into a permanent home. From then on the settlement is where the real multipliers live.
Each of the six categories needs at least one assigned worker before any of its upgrades apply. Workers past the first add +50% each. Building a facility and forgetting to staff its category is the most common way to wonder why nothing changed.
assignMult = 0 (none) · 1 (one worker) · 1 + 0.5 × (workers − 1) effect = categoryLevel × perLevel × assignMultIf you are optimising for speed, chase these
| Facility | Category | What it does for you |
|---|---|---|
| Chronology Wall | Record | More frequent Ark Falls and floating boosts |
| Deep Interface | Record | Shorter deep-exploration legs |
| Archive Chest | Record | More research from Ark Falls and Insight boosts |
| Expedition Bay | Route | Opens extra expedition lines free (no purchase needed) |
| Field Map Table | Route | Each trip counts for more toward the next region |
| Departure Signal | Community | Same — faster region discovery |
| Observation Mast | Route | Finds expedition survivors sooner |
| Marker Workbench | Route | Bigger deep-exploration node caches |
| Convoy Rig / Salvage Bench | Route / Repair | Bigger expedition hauls |
| Rest Ring / Quiet Corner | Community / Care | More offline capacity |
Facilities are gated first by research (to unlock) and then by banked resources (to build), both on a steep curve — costMult(i) = 15^(i(i+1)/2) for the i-th item in a category. The first in each category is free to unlock, so grab all six of those immediately.
Research
Assign banked survivors as researchers; points accrue across six categories that mirror the settlement ones. All six default on, and the pool is split evenly between whichever are enabled — so turning categories off concentrates everything into the ones left on. If you need one specific facility unlocked, switch the others off and funnel the whole pool at it. Points persist across breaking camp.
Endgame: the Deep Ark, the Anchor Test and Scars
Claiming the Hatch at the end of the deep map reveals the Deep Ark — a descent of seventeen explorable milestones (twelve inside the Ark, five through the caves below) ending at the Anchor Test.
You open a milestone by sacrificing a banked survivor, which starts an 18-hour timer. Every additional survivor you sacrifice removes 10 minutes from it, multiplied by the Deep Ark Sacrifice memory upgrade (+50% per level). At base that means roughly 109 survivors clears a milestone instantly — or you simply let the timer run, online or off.
Community facilities and the Birth player upgrade both grow survivors passively. Late in a run, survivor count is your descent speed — every 109 of them is a milestone skipped.
The Anchor Test
The Anchor Test resets the run in exchange for Memories:
first test: 10 × gainMult later tests: 10 × (committableResources / anchorBaseline) × gainMult gainMult = 1 + 0.5 × (More-Memories level)Kept: every Memory and memory upgrade, your Scars track, store purchases, offline cache, the anchor baseline, your test count and Time Stability. Reset: everything else. Each test adds +5 Time Stability, and 100 is the true ending — so the run is twenty Anchor Tests long, and each one should be faster than the last.
Memory upgrades cost 5 × 2.17ˡᵉᵛᵉˡ. In rough priority for a first prestige: Gathering ×2 → Cheaper Survivors → Faster Expeditions → Faster Deep Explore → More Memories.
Time Wave Scars — the second, hidden prestige track
Each First Wave milestone you reveal opens one Time Wave Scar (so up to seven per run). Stepping into a Scar resets your player level to 0 while keeping every point you have already earned — so you re-climb the level curve and bank the points a second time. Each Scar also grants 1 Scars Knowledge, which buys a parallel set of nine upgrades that stack on top of your Memory upgrades. Scar upgrades cost their next level in points (1, then 2, then 3…).
Unused Scars are lost at the Anchor Test — they do not carry over. If you have open Scars and you are about to prestige, burn them all first. The confirm dialog warns you, and it is worth reading.
Traps & common mistakes
- Going offline with a fork pending. The descent stops dead. Costs whole nights.
- Leaving an Ark Fall marker unclaimed. It blocks the next one from spawning.
- Leaving survivors idle instead of sending them. Idle survivors gather nothing and still draw upkeep; on a trip they haul all three resources plus parts. (Before 1.0.7 the reverse was true — crew size did nothing for supplies. Old advice to send small crews is out of date.)
- Cancelling an expedition. Zero reward, zero credited time. Wait it out.
- Building settlement facilities and not staffing the category. Zero effect until a worker is assigned.
- Claiming First Wave stages the moment they unlock. They pay at your current rate — stack first.
- Letting water or food hit zero. An easy ⅓ or ⅙ multiplier on everything you produce.
- Spreading survivors evenly across all three resources. Skill XP is pooled per resource; concentration compounds.
- Anchoring with unused Scars open. They are gone.
- Leaving research categories all switched on when you need one specific unlock. The pool splits evenly — narrow it.
Reference tables
Costs & curves
| Thing | Formula |
|---|---|
| Next survivor (from the wreck) | 30 × 2.7ⁿ material |
| Next tool level | 50 × 2.7ˡᵉᵛᵉˡ material |
| Next resource-skill level | 600 × 2.7ˡᵉᵛᵉˡ XP (1 XP per unit gathered) |
| Next player level | 400 × 3.7ˡᵉᵛᵉˡ XP |
| Next Memory upgrade level | 5 × 2.17ˡᵉᵛᵉˡ Memories |
| Next Scars upgrade level | currentLevel + 1 Scars Knowledge |
| Facility i in a category | costMult(i) = 15^(i(i+1)/2) |
| Camp upkeep | (survivors + 1) × ⅓ /sec of water and food |
| Offline capacity | 3600s × (1 + offlineCache, max 5) + 600s × offlinePoints |
Timings
| Thing | Time |
|---|---|
| Expedition tiers | 30 sec · 7.5 min · 30 min · 3 h · 6 h · 12 h · 24 h |
| Expedition survivor milestone | every 6 h of cumulative expedition time |
| New area charted | at 12 h of cumulative expedition time |
| Deep exploration, one leg | 2 h base (−25%/level with Faster Deep Explore, to −90%) |
| Deep Ark milestone | 18 h base; −10 min per extra survivor sacrificed |
| Ark Fall | ~every 13 min of active play |
| Floating boost | ~every 60 s, on screen for 9–15 s |
| Recurring event | every 30–360 min of play (never offline) |
Node caches on the deep map
| Node | Cache | Also does |
|---|---|---|
| Site | 15 min of gather | — |
| Camp / Story / Contact | 20 min | Branch point · story · Watcher encounter |
| Evidence (exactly 7) | 20 min | Reveals a First Wave stage |
| Abandoned camp | 30 min | — |
| Hatch (node 99) | 60 min | Reveals the Deep Ark |
All caches are banked directly into your Settlement, and all are paid at your production rate at the moment you claim.
Go and dig
Every number above comes straight out of the game's own code. If something here stops matching the game, tell me in the Discord and I'll fix it.
 Play free on Steam
 Open the Codex